How to Make a Shipping Container Pool: A Realistic DIY Guide

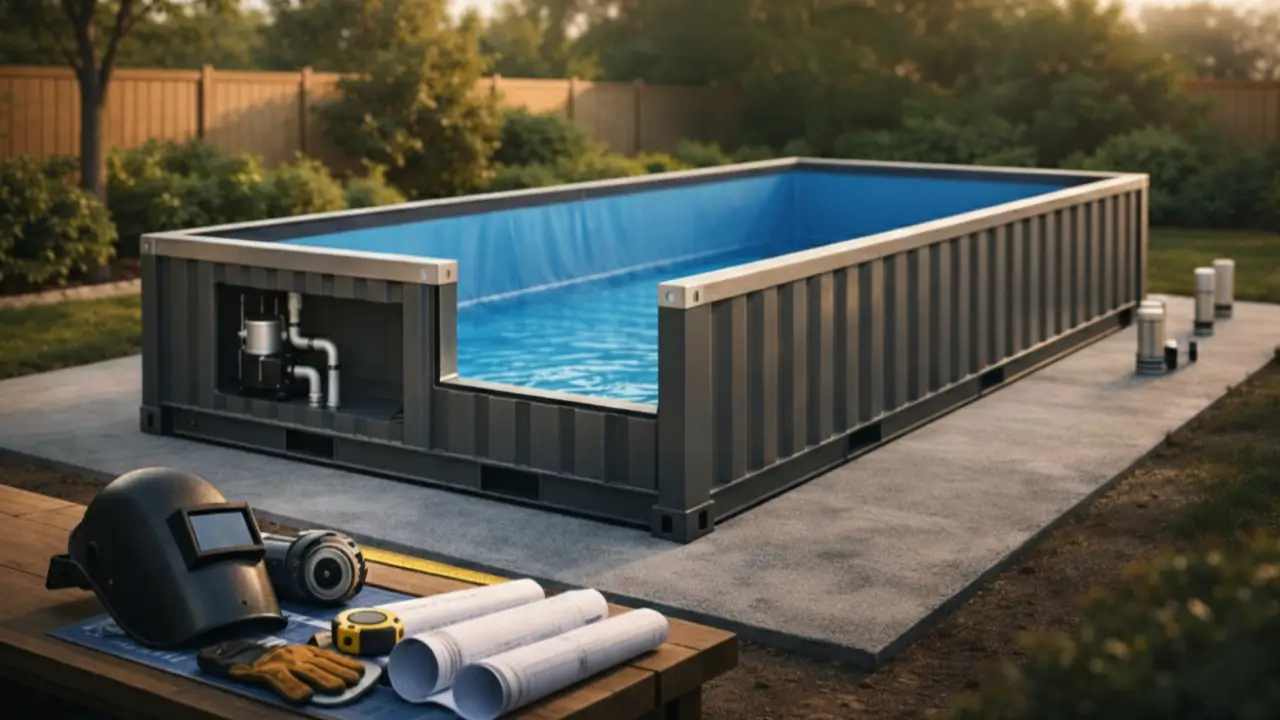
A 20‑foot shipping container is about 5.898 m long and 2.352 m wide on the inside. Fill it to a depth of only 1.2 m, and you’re holding around 16.6 m³ of water (approximately 16,600 liters). Since water is roughly 1 kg per liter, that’s about 16,600 kg pushing out on the walls and down on the base. If you’re searching for how to make a shipping container pool, this weight is the real starting point—not the paint color.
The problem is that containers are designed to carry heavy loads through their corner posts, not to act like long water tanks. So, DIY builds often encounter the same failures: walls that start to bow, seams and cutouts that leak, and rust that appears quickly if the steel isn’t treated correctly. Then there’s the legal side. Many US areas require permits and a compliant pool barrier, often based on model codes like the International Swimming Pool and Spa Code (ISPSC).
How To Make A Shipping Container Pool Safely (What To Know First)?
A container pool can last, but only if you treat it like a structure that must handle constant water pressure, moisture, and chemicals. The goal is straightforward: the walls remain straight, the shell remains sealed, and the setup complies with local safety regulations.
Reality check
Water gets heavy fast. 1,000 liters of water weighs about 1,000 kg, so even a “small” pool holds several tonnes.
Water also pushes outward. Pressure rises with depth at about 9.8 kPa per meter of water. A pool that’s 1.2 m deep has roughly 12 kPa of pressure at the bottom, pushing on the steel and seams all day.
Engineering risk
Most shipping containers are built for transporting loads and handling at the corners, under a regulated safety system. Many containers used in international service carry a CSC Safety Approval Plate, which is tied to testing, inspection, and maintenance rules. That’s a good sign for general condition, but it does not guarantee the side walls will stay rigid after you cut openings and fill it with water.
The common DIY failure points are simple:
- Long walls bowing from water pressure
- Leaks at cut-outs (skimmer/returns/lights) if the metal isn’t framed right
- Rust at seams and welds if surface prep and coatings are rushed
When to hire pros
Bring in pros when mistakes can get dangerous or very expensive to undo:
- Structural engineer or experienced fabricator for the reinforcement plan (especially if you’re cutting big sections).
- Qualified welder for structural welds and framed openings.
- Licensed electrician for pool-area power, because pools have special shock-risk rules (GFCI, bonding, clearances) under NEC Article 680.
Also, plan for code compliance, like barriers/fencing. Many US areas rely on code frameworks, such as the International Swimming Pool and Spa Code (ISPSC), for safety requirements.
Phase 1: How To Plan Your Shipping Container Pool Build?
Good planning saves you from the two biggest DIY failures: buying the wrong container and placing it on a base that shifts. This is also where you prevent permit surprises that can stop the project mid-build.
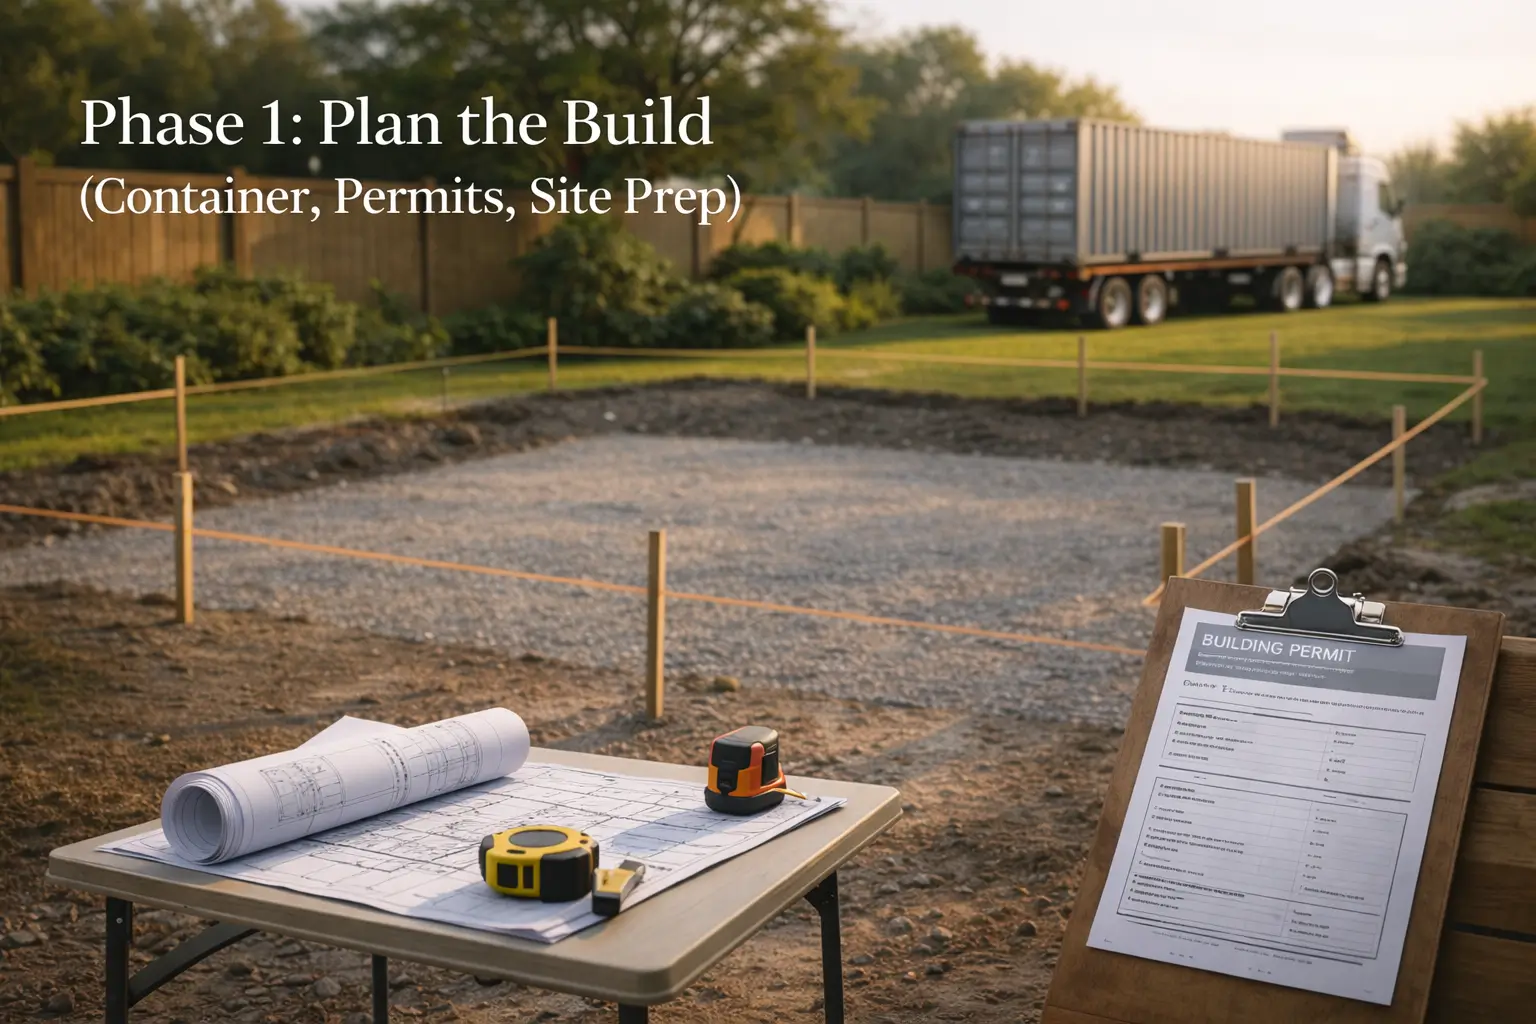
Pick the container
Choose your size first, then your depth. A standard container has an internal height of about 2.39 m, while a high-cube is about 2.69 m inside. That extra depth can feel better as a pool, but it also raises the stakes for reinforcement and waterproofing.
Before you buy, inspect it as if you were buying a used car. Look for:
- Straight long walls (no obvious waves or past “patch” welds)
- Rust you can’t punch through (surface rust is common; deep pitting is a red flag)
- Solid floor (no soft spots)
- Doors that open and close cleanly (a twist can mean frame issues)
Also, check for the CSC Safety Approval Plate. It’s part of the international container safety system, and the IMO notes containers must be periodically examined under CSC rules. It’s not a “pool approval,” but it’s a useful paper trail for age and ratings.
Handle permits
Plan for permits early, as pools typically require multiple checks (structure, safety, and utilities). Many US cities treat this as a pool plus a structure, even if it “looks portable.”
Barrier rules are a common non-negotiable. For example, one US city code amending ISPSC language requires a minimum 48 in (1,219 mm) barrier height for pools governed by the residential code. Your local rule may differ, but the point is the same: you’ll likely need a compliant barrier plan.
Prepare the site
Do not set the container on bare ground or grass. If the base settles unevenly, the shell can twist. That leads to cracked coatings, stressed welds, and leaks.
Keep it simple and stable. Most DIY-friendly paths are:
- Concrete pad (most stable and easiest to level long-term)
- Compacted gravel base (must be properly built and perfectly level, with drainage handled)
You need clear space for delivery and placement, and you need a spot for pump/filter equipment that won’t flood when it rains.
Phase 2: What Structural Metalwork Does The Container Need?
This is the make-or-break phase. Once you cut and fill the container, water pressure will find weak steel fast. The goal is to keep the long walls rigid, protect the cut edges, and lock in corrosion control before anything gets wet.
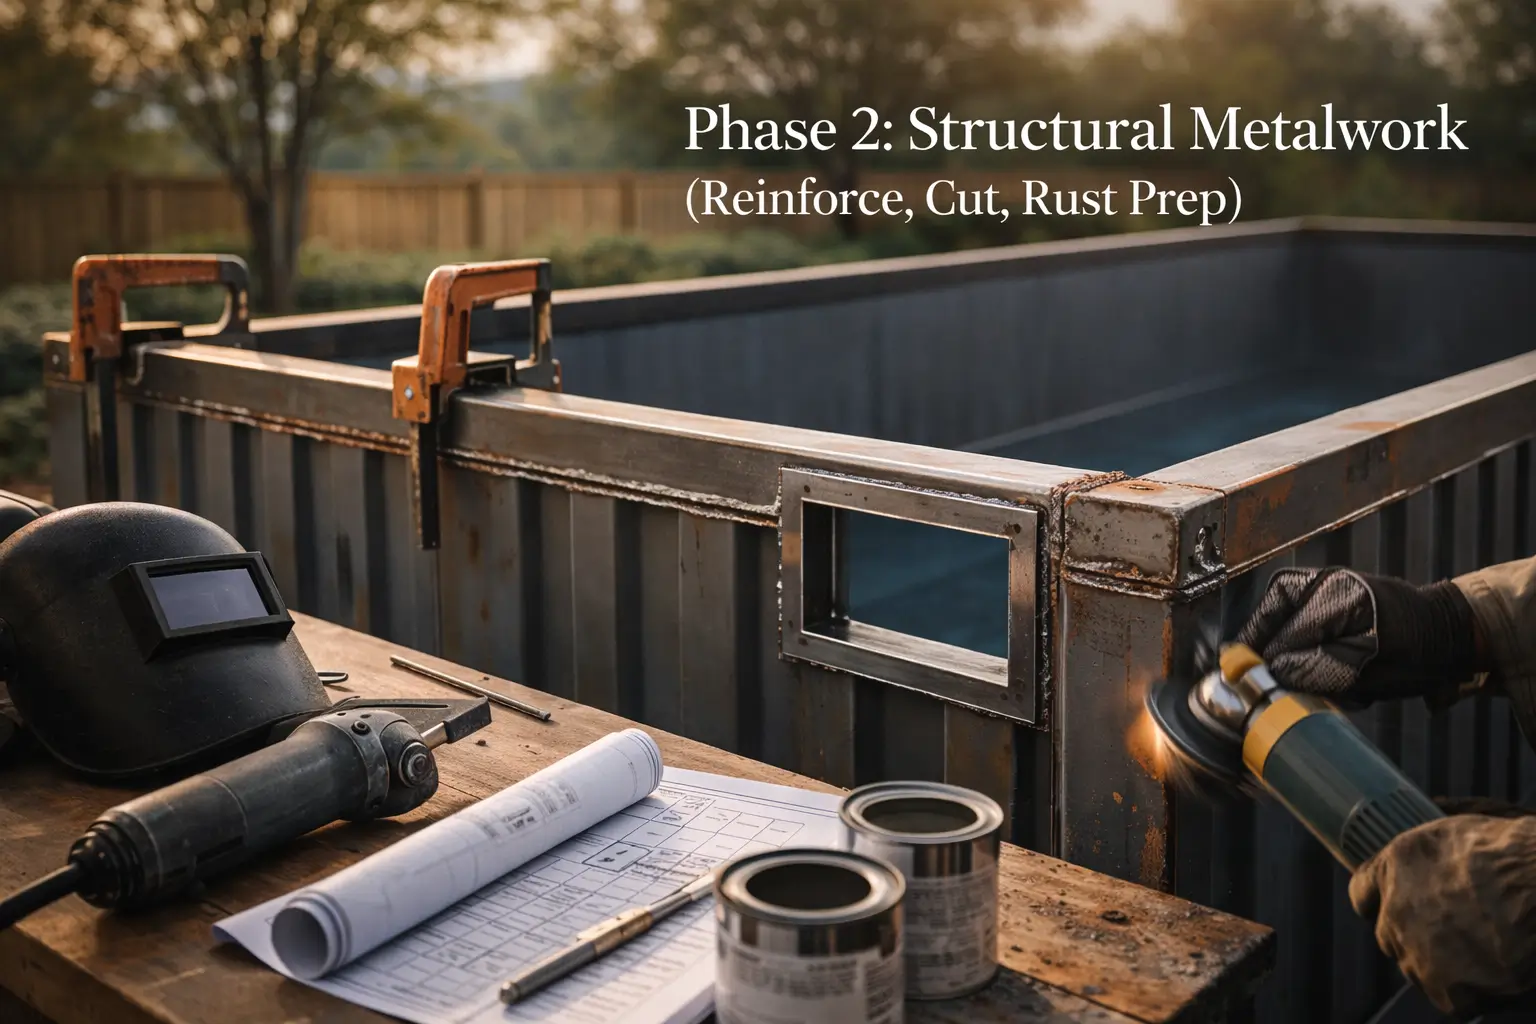
Prevent bowing
Shipping containers are strongest at the corners. Their side walls were not designed to act like a long water tank. When you fill the pool, the long sides can bow outward.
In most builds, reinforcement means adding steel to the top edge and side walls so they cannot spread, such as:
- A top rail (box steel) to stiffen the opening
- Cross-bracing or ribs along the long walls (based on your design)
If you skip this, the waterproofing is fighting a moving target.
Add plumbing openings
Every hole you cut is a weak point unless it’s framed. Skimmers, returns, and lights should be treated like structural openings, not “cut-and-caulk” jobs.
Key basics:
- Cut clean openings, then frame them with welded steel so the wall stays stiff
- Plan plumbing locations before you reinforce, so you don’t cut through new bracing
- Protect edges (sharp steel + liner/coating = failure point)
Treat Rust and Corrosion
Do rust work before waterproofing and before you fill. Pool water, splashes, and chemicals speed up corrosion.
Keep it simple:
- Remove rust to clean metal where possible
- Use a proper primer + topcoat system on the exterior and vulnerable seams
- Pay extra attention to welds, corners, and cut edges (these rust first)
Phase 3: Which Waterproofing Method Should You Choose?
This is the most debated part of a container pool build because steel is not naturally watertight. The “best” choice depends on how much leak risk you can accept, how clean your metalwork is, and how easy you want future repairs to be.
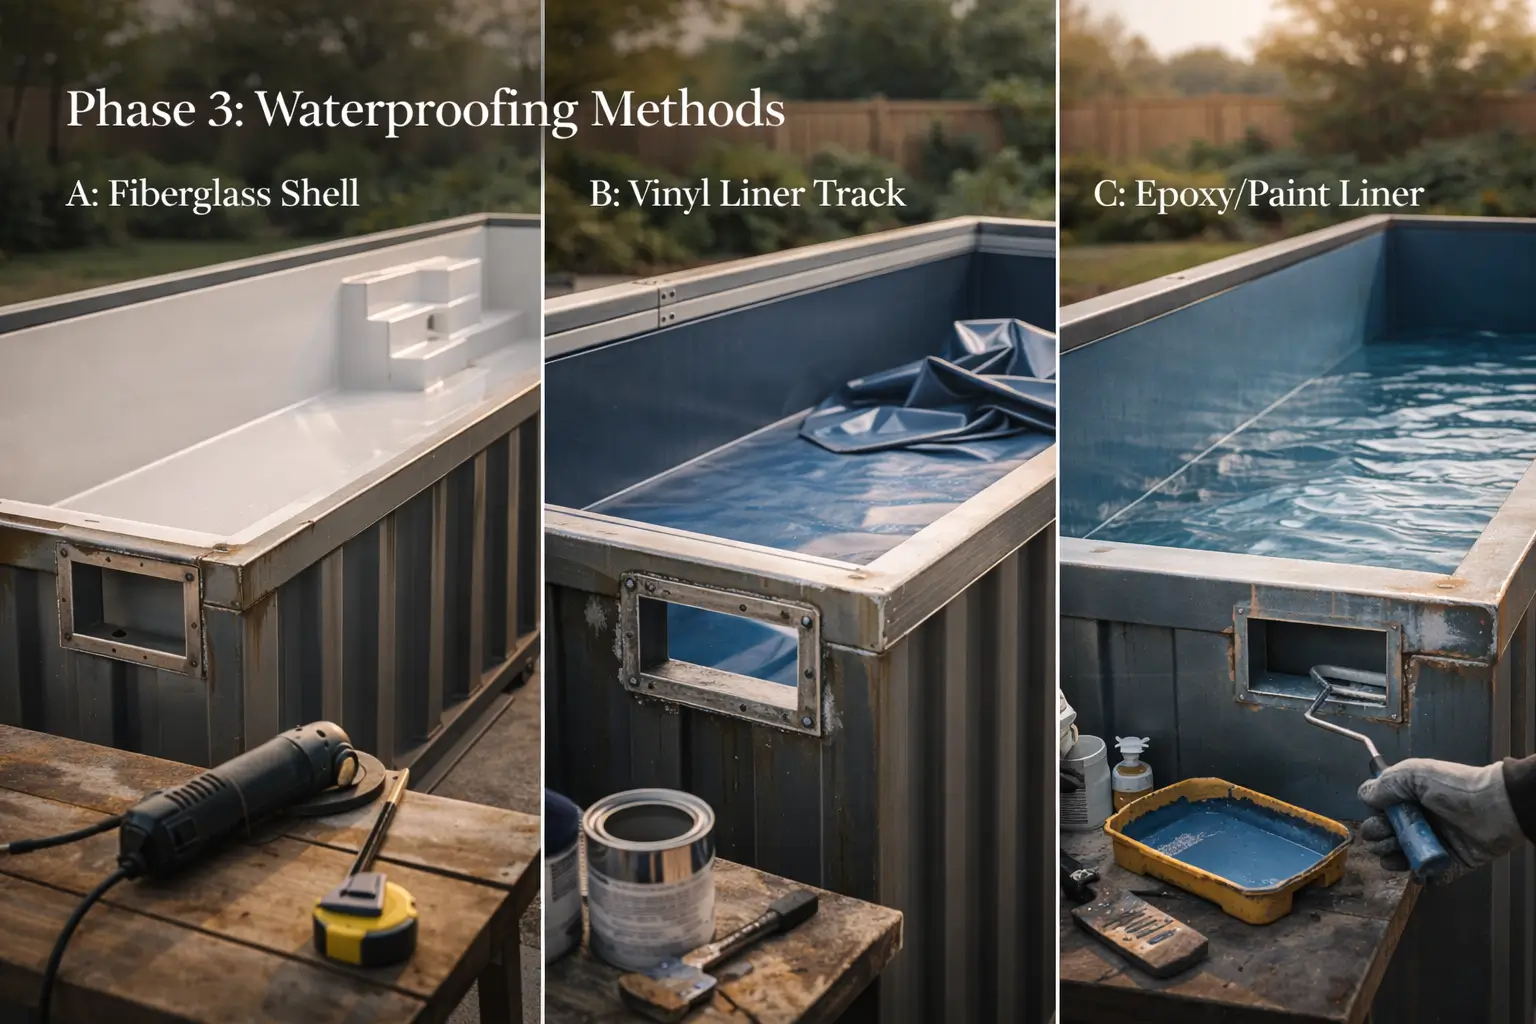
Option A: Fiberglass shell
This is usually the lowest-risk route for leaks because the shell itself is watertight.
Good fit if:
- You want the most predictable water-tight result
- You can pay more upfront for a custom-fit insert
- You want a smoother surface that’s easy to brush and keep clean
Watch-outs:
- Higher cost and tight fit requirements (your container must be straight)
- Transport/installation can add complexity
Option B: Vinyl liner track
This gives a “traditional pool” feel and can be a solid middle ground when done precisely.
Good fit if:
- You want a proven pool interior system
- You’re comfortable with careful measuring and clean edges
- You want liners to be replaceable later
Watch-outs:
- The track must be mounted perfectly or the liner can wrinkle or pull
- Corners, stairs, and penetrations need extra care to prevent leaks and tears
Option C: Epoxy/paint liner
This sounds like the simplest DIY option, but it’s also the easiest to get wrong. Most failures come from prep, not the product.
Good fit if:
- You want the most DIY-friendly path on budget
- You can do slow, careful surface prep and strict cure times
- You accept that recoating may be part of ownership
Watch-outs:
- Any remaining rust, oil, dust, or moisture can cause peeling
- Cracks often start at seams, welds, and sharp edges if they aren’t prepped well
Phase 4: How Do You Set Up Filtration, Circulation, And Cleaning?
A container pool is long and narrow. That shape can circulate unevenly. If your flow is weak or poorly aimed, debris settles fast, and algae, shows up in corners.
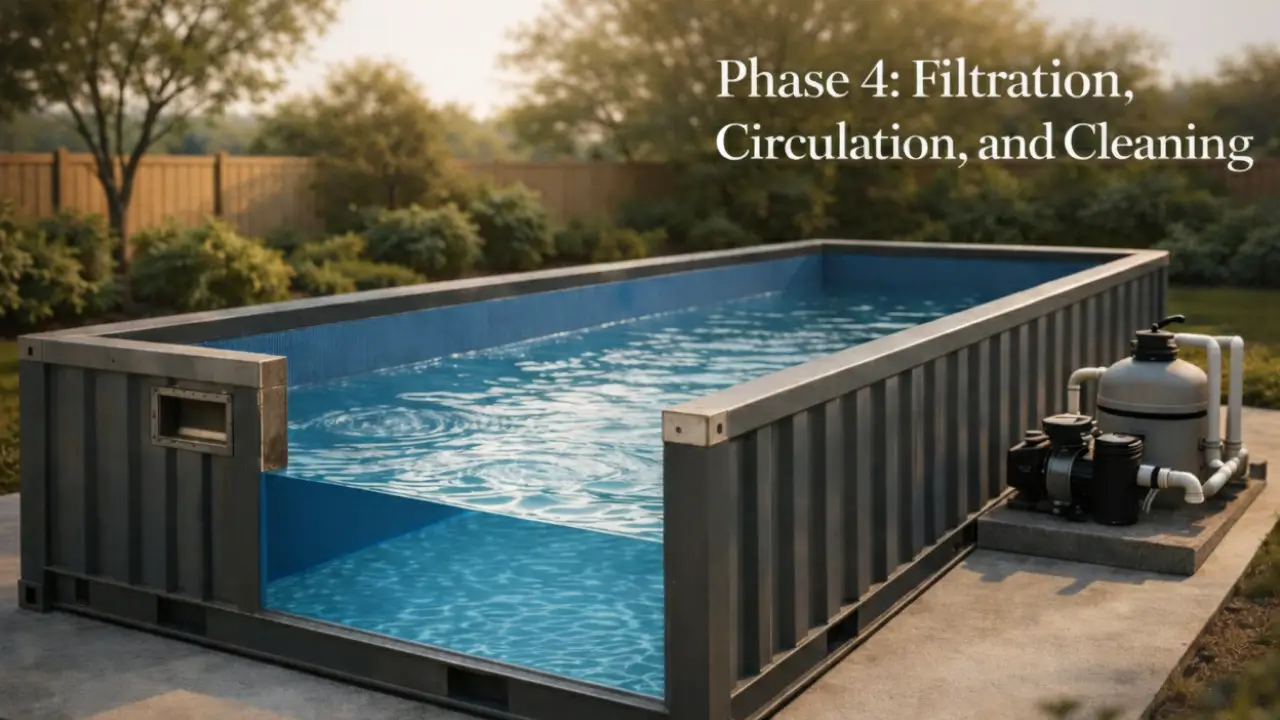
Sizing the Pump and Filter
Start with volume. A standard 20 ft container is often listed at about 5,898 mm (5.898 m) internal length and 2,352 mm (2.352 m) internal width.
A fast estimate in metric is: Volume (m³) = L × W × average water depth. Then multiply by 1,000 to get liters.
A simple sizing target many pool guides use is an ~8-hour turnover as a starting point for residential pools (then adjust based on clarity, heat, debris, and use).
So your starting flow target is: Flow (L/h) = Pool volume (L) ÷ 8.
Fix “dead zones”
Rectangles get slow spots at the ends and corners, especially if returns all point the same way or sit too close together.
Keep it practical:
- Put the skimmer and returns on opposite sides when you can, so water crosses the full length.
- Aim returns slightly downward and along the long wall to create a slow “loop” instead of a short, splashy jet.
- Avoid placing every return on one end. That leaves the far end stale.
Maintain the pool
Even with good circulation, you still get buildup on the floor and in corners. Container pools make this harder because the walls are straight and deep, so manual vacuuming can be awkward.
This is where a robotic cleaner fits naturally. For example, the Aiper Scuba X1 Pro Max is built for floor and wall cleaning with strong stated flow/suction (8,500 GPH / 32,000 LPH) and dual brushes, which help with frequent bottom scrubbing in tight rectangular pools.
What Does It Cost To Build A Shipping Container Pool?
A shipping container pool is rarely “cheap” once it’s safe, sealed, and code-compliant. Cost guides commonly put installed container pool totals around $35,000–$65,000, with wide swings based on size, site work, and how turnkey the install is.
Hidden costs
These are the line items that blow up budgets because they’re easy to forget:
- Crane or lift day: Even small crane rentals can start in the hundreds of dollars per day, and full-service crane + operator + rigging can run much higher depending on lift size and city.
- Welding/fabrication: Pros often charge $60–$125 per hour, and container pools usually need real steelwork (not cosmetic welds).
- Concrete base: National averages often land around $6 per ft² installed (about $65 per m²) before reinforcement, access, and site issues.
- Pool barrier/fence: Installed pool fence pricing is often cited at $15–$25 per linear foot (about $49–$82 per meter).
- Licensed trades: Even if you DIY the build, electrical and plumbing work is commonly priced hourly and may be required for inspection sign-off.
Is DIY worth it?
DIY can save money mainly by reducing paid labor. But it increases risk and time, and you still pay for tools, materials, and the “no-choice” pros.
| Feature | Standard Watering | Smart Irrigation |
|---|---|---|
| Water Usage | High and wasteful | Optimised and efficient |
| Microbe Health | Dries out or drowns | Stable and thriving |
| Nutrient Absorption | Nutrient leaching | Maximised uptake |
If your goal is savings, DIY only “wins” when you already have strong fabrication skills (or access to them), and you plan for the same safety items a prefab build includes.
Conclusion
A shipping container pool can be a smart project, but only when you treat it like a real build, not a quick DIY hack. The safe path is boring on purpose: start with planning, obtain permits early, and establish a foundation that won't shift. Then reinforce the steel before cutting anything, and choose a waterproofing method that you can actually install and maintain without rushing the preparation. After that, filtration and circulation matter more than most people expect, especially in a long rectangle where debris collects in corners. If you prioritize stability, sealing, and regular maintenance, you end up with a pool that looks great and lasts.
FAQs
How much does it cost to build a shipping container pool?
Most real-world projects land in the tens of thousands of dollars once you include delivery, site work, waterproofing, and equipment. One 2025 cost review puts shipping container pools at $15,000 to $100,000, with many homeowners spending around $50,000.
How long do shipping container pools last?
If the structure is reinforced, fully sealed, and kept ahead of corrosion, lifespan can be similar to other pool shells. One cost guide estimates container pools can last up to about 25 years (with durability depending heavily on build quality and upkeep).
Do container pools rust?
Yes. Steel rust is always a risk, especially at welds, seams, cut edges, and any area where water accumulates. Chloride exposure and “trapped moisture” areas structures with crevices/sheltered areas under higher chloride contamination. That’s why coating quality and regular inspection matter so much on container pools.
Do you need permits for a container pool?
In most US areas, yes—and you’ll often need to meet pool safety barrier rules as well. For example, Pima County (AZ) cites the ISPSC and states that barriers must be at least 48 inches (approximately 1.22 m) above grade (local rules vary, but this illustrates the common enforcement of barrier heights).