How to Find a Pool Leak with Dye: A Step-by-Step Guide

Suspecting you have a pool leak is stressful. You're watching the water level drop day after day, worrying about high water bills and the potential for a complicated, expensive repair. You know there's a problem, but you can't see the source.
A simple dye test is the fastest, cheapest, and most effective DIY method to confirm a leak's exact location. It’s a key diagnostic tool in the overall process of how to find a pool leak.
This guide will walk you through the step-by-step process to get a clear answer and move from a state of frustration to one of confidence.
First: The Food Coloring vs. Pool Dye Debate
Before we get to the "how-to," let's clear up the most common question. When you're standing in your kitchen, that little bottle of blue or red food coloring can seem like a perfectly logical solution. But there's a reason pool professionals use specialized dye.
Can You Use Food Coloring to Find a Pool Leak?
Yes, you can, but it is not recommended for most leaks.
Food coloring is designed to disperse quickly in liquid. In a massive body of water like a pool, it simply isn't concentrated enough. It will cloud and dissipate almost instantly, making it useless for finding the small, subtle leaks that are most common. You might get lucky if you have a massive, gushing crack, but for most leaks, it will just leave you with more questions.
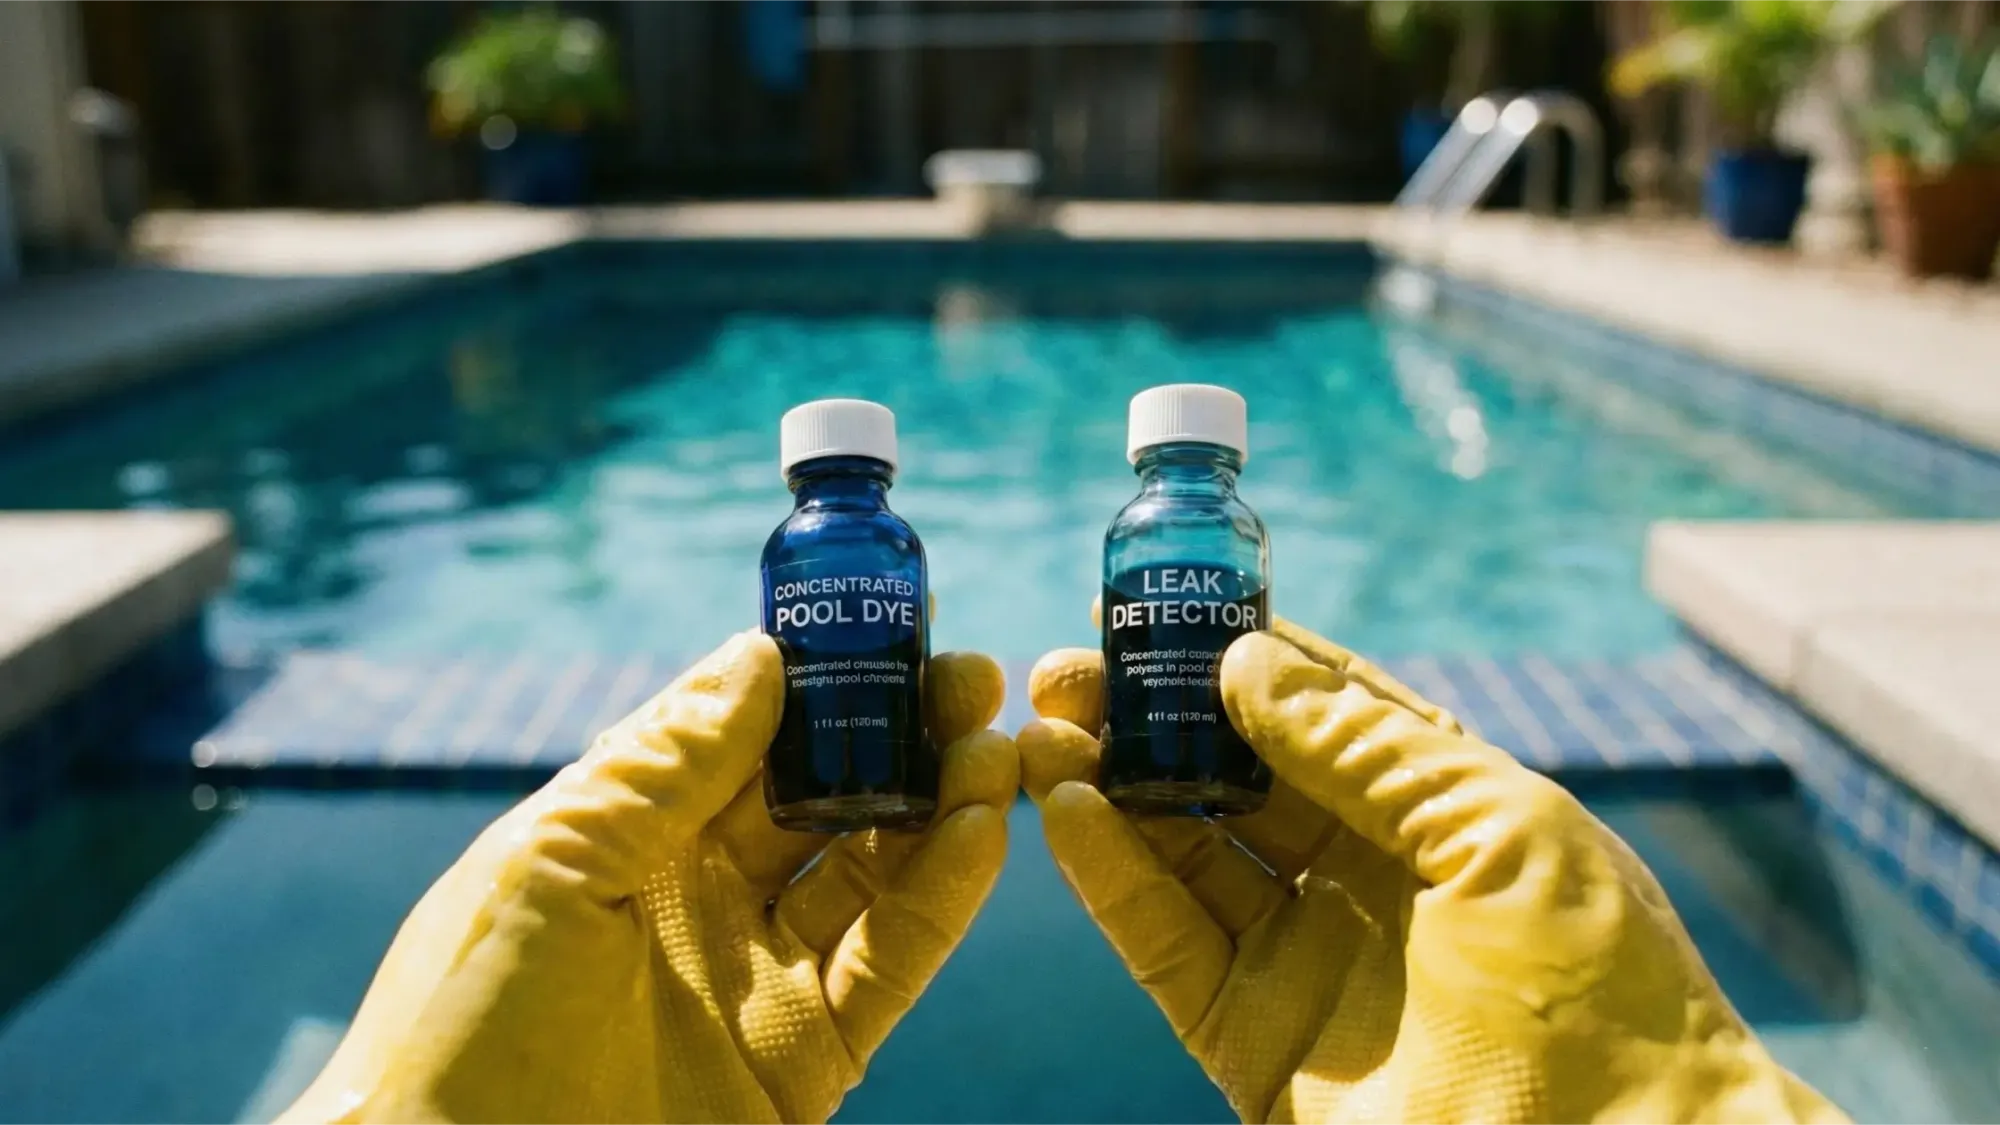
What Makes Professional Leak Dye Different?
Professional pool leak dye is a highly-concentrated, non-staining colorant specifically engineered for this job.
Its key benefit is its neutral buoyancy. It's designed to stay together in the water as a thin, cohesive "thread" of color. This allows you to create a small, visible stream that will be visibly pulled into even tiny, hairline cracks by the force of the leak. This is what allows you to see the invisible.
What Tools Do You Need for a Dye Test?
The good news is you don't need much.
- Pool Leak Dye: A small bottle of concentrated, professional-grade dye. It's inexpensive and available at any pool store or online.
- A Dye Applicator: This is essential. Do not just squeeze the dye from the bottle. You need a syringe or a specialized dye applicator (which is often a plastic bottle with a long, thin needle-like tip) for a precise, controlled application.
- Goggles: A good pair of swim goggles is crucial so you can see clearly underwater.
How to Perform a Pool Dye Test: A Step-by-Step Guide
This is the core process. Follow these steps exactly, and don't rush. Patience is the key to an accurate test.
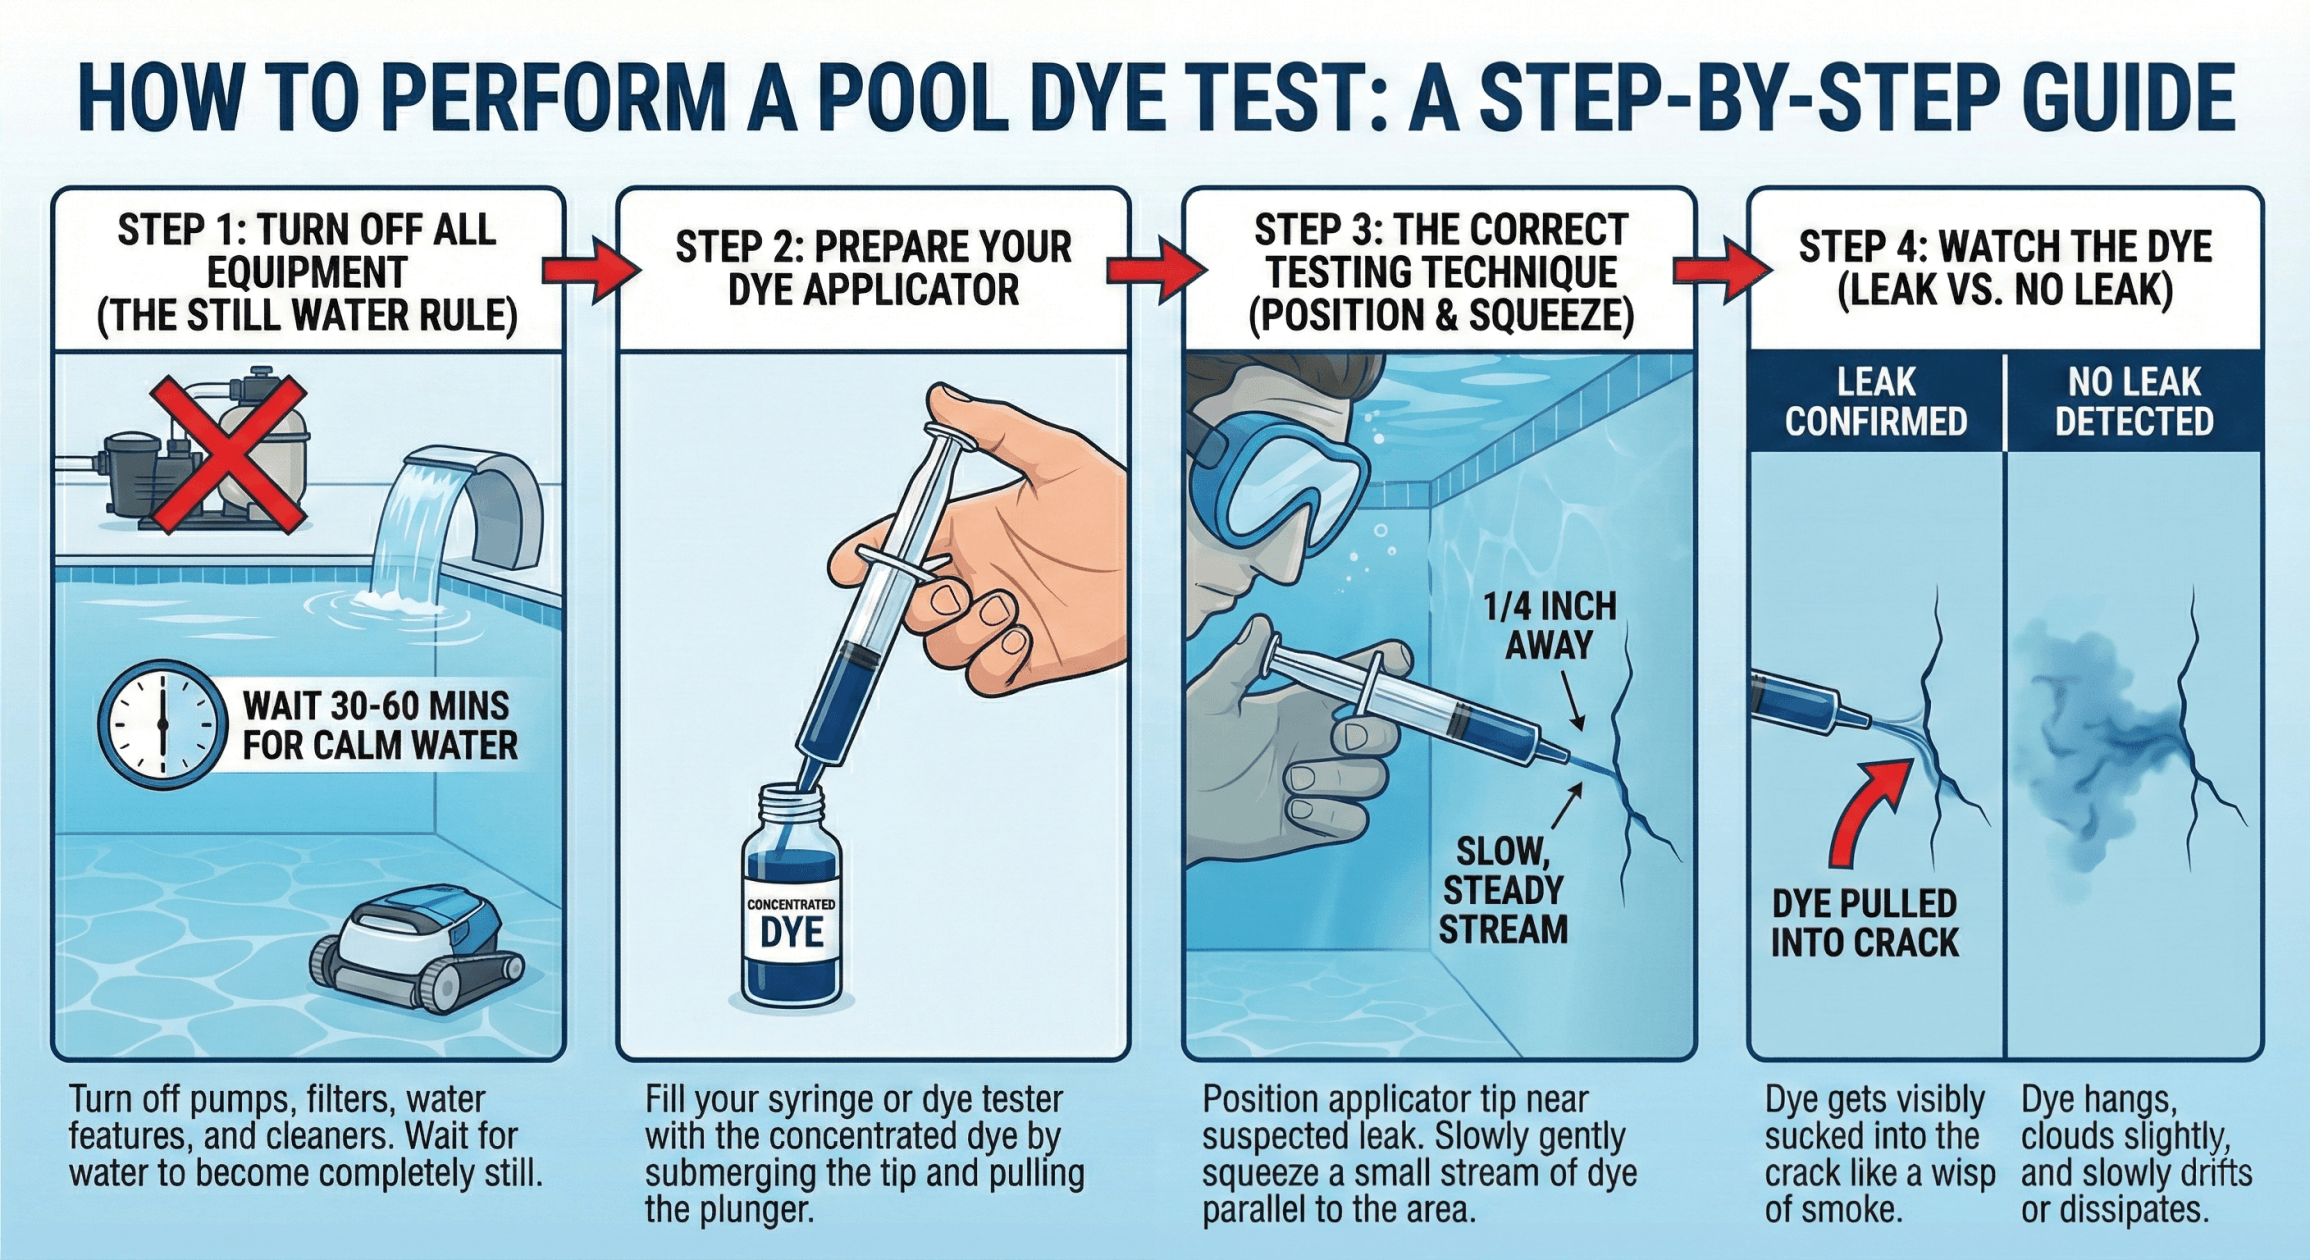
Step 1: Turn Off All Equipment (The Still Water Rule)
This is the single most important rule. A dye test will only work in perfectly still, calm water. Any current, no matter how small, will immediately disperse the dye and give you a false result.
- Turn off your main pool pump and filter system.
- Turn off any water features like waterfalls, deck jets, or bubblers.
- Remove any active pool cleaners. If you run a modern robotic pool cleaner, like an Aiper, make sure its cycle is finished and it is out of the pool. Even the small currents from a cleaner moving across the floor will disrupt the test.
Once everything is off, you must wait at least 30-60 minutes for the water to become completely calm and still.
Step 2: Prepare Your Dye Applicator
Fill your syringe or dye tester with the concentrated dye. If you're using a syringe, submerge the tip in the dye bottle and pull the plunger back to fill it.
Step 3: The Correct Testing Technique (How to Watch the Dye)
This is where most people go wrong. You are not trying to "squirt" the dye into the crack. Your goal is to see if the water around the crack is being pulled into it.
- Put on your goggles and approach the area you suspect is leaking.
- Position the tip of your applicator about 1/4 of an inch away from the suspected crack or fitting.
- Slowly and gently squeeze a small, steady stream of dye into the water, parallel to the crack.
- Watch the dye, not the crack.
- If you have a leak: You will see the thin thread of dye get visibly pulled out of the water and into the crack. It will look like a wisp of smoke being sucked into a vacuum. This is your confirmation.
- If there is no leak: The dye will hang in the water, cloud slightly, and slowly drift or dissipate. It will not be drawn to the spot.
Move slowly and test all potential areas. Refill your applicator as needed.
A Checklist: The Most Common Places to Test for Leaks
A leak can happen anywhere, but most occur where something joins the pool shell. Here is your checklist of high-priority areas to test.
Testing the Skimmer
This is the most common culprit. The plastic skimmer body can separate from the concrete pool shell.
How to Test: Carefully apply dye around the entire "throat" or opening of the skimmer where it meets the pool tile or wall. Also test inside the skimmer, around the connections at the bottom.
Testing the Return Jets and Fittings
The return jets (where water shoots back into the pool) are another common failure point.
How to Test: Apply dye around the outside edge of the plastic fitting where it meets the pool wall.
Testing Pool Lights
The conduit that holds the wiring for your pool lights is a major weak spot.
How to Test: Apply dye around the entire conduit plate and lens. If you see the dye being pulled in, the leak is likely in the conduit behind the light.
Testing the Main Drain (If Accessible)
This is the most difficult to test. Only attempt this if your pool is shallow enough to reach it safely.
How to Test: Get as close as you can and apply dye around the edge of the drain cover. A strong leak here will pull the dye in quickly. If you suspect the main drain, this is often a job for a professional.
Testing for Shell Cracks (Gunite/Fiberglass)
Any visible crack in your pool's surface is a prime suspect.
How to Test: Start at one end of the crack and slowly move your applicator along its entire length, keeping the tip 1/4 inch away. Watch closely to see if the dye is pulled in at a specific point.
Testing for Liner Tears (Vinyl & Above-Ground Pools)
For vinyl-liner pools (both in-ground and above-ground), leaks are almost always tears in the liner itself.
How to Test: Pay close attention to areas around fittings (skimmer, jets, drains) and in corners. If you find one, the next logical step is often a simple pool liner repair.
You Found the Leak... Now What?
The dye test has done its job: it has replaced your fear with a clear answer. Now you can make a plan.
Identifying DIY vs. Professional Repairs
Potential DIY Fixes:
- A small, simple tear in a vinyl liner (can be fixed with a patch kit).
- A loose fitting that just needs to be tightened.
- Using two-part epoxy or pool putty for a very small crack.
When to Call a Professional:
- The leak is inside the skimmer body or at the main drain.
- The leak is in the plumbing (being pulled into a return jet or skimmer pipe).
- You found a large, structural crack in the pool's shell.
- You couldn't find the leak at all. If you are still losing water but the dye test showed nothing, the leak is likely in your underground plumbing—a job that requires specialized pressure-testing equipment.
From Frustration to Clarity
A dye test is the most empowering tool a pool owner has for leak detection. By taking an hour to calmly and methodically test your pool, you are no longer guessing. You have moved from "I think I have a problem" to "I know exactly where the problem is."
With this clear data, you now have the power to decide your next step—whether it's a simple DIY repair or calling a professional with precise information.
Frequently Asked Questions on Pool Dye Test
Will pool leak dye stain my pool liner or plaster?
No. Professional pool leak dye is specifically formulated to be non-staining. It will not harm your pool's surface, whether it's plaster, pebble, fiberglass, or vinyl.
Is pool leak dye safe for my filter and pool water?
Yes. The dye is non-toxic, chemically inert, and safe for your pool water, your filter, and your sanitation system. It will be filtered out over time. Speaking of which, it's always a good idea to know how often to clean your pool filter to keep it working efficiently.
How long do I need to keep the pool pump off?
Keep the pump off for the entire duration of your test. Once you have finished testing (whether you found the leak or not), you can turn your pump back on. (This is a good reminder to also check your normal pool pump run times.)
What if I do the dye test and don't find any leaks?
If you have dye-tested all the common spots and are still losing water, this almost always points to a leak in the underground plumbing. Before you call a professional, there is one other test you can perform: the bucket test for pool leaks, which confirms if you're losing water to a leak or just evaporation.