How to Pre-Germinate Grass Seed: A Foolproof Guide for Perfect Lawns

Traditional grass seed germination can take anywhere from 1 to 6 weeks, depending on the specific variety chosen. Kentucky bluegrass needs 4 to 6 weeks to emerge completely. Perennial ryegrass sprouts much faster in just 1 to 2 weeks.
A quicker solution exists to achieve a green, lush lawn. Pre-germination speeds up this timeline by soaking seeds until their first root emerges. Soaked grass seeds typically sprout their first root in two to six days. Perennial ryegrass seeds need only two to three days of soaking before planting.
The right timing makes a huge difference in lawn care success. Grass reaches its peak growth when planting seasons match the seeds' natural growth cycles. Late summer or early fall works best to plant cool-season grasses. Late spring and early summer provide ideal conditions for warm-season varieties.
This piece shows you the exact steps to pre-germinate grass seed using buckets, water, or alternative methods. You'll discover why this technique proves effective and the best ways to care for pre-germinated seeds after planting. Your lawn will soon become your neighborhood's standout feature!
What is Pre-Germination and Why It Works
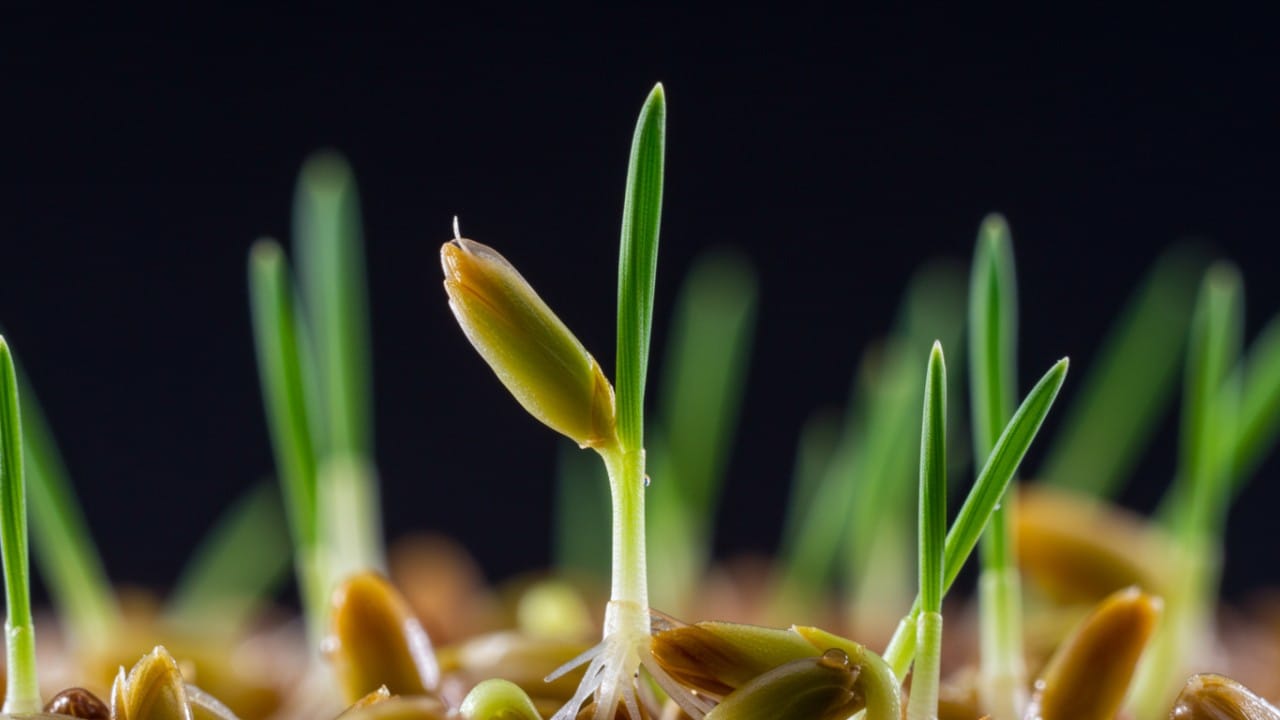
Pre-germination happens when you soak grass seed until the original root tip breaks through the seed coat. Regular seeding lets germination happen in soil, but pre-germination kicks off this natural process in a controlled setting.
Seeds soak up water and trigger enzymes that wake up dormant energy stored inside them. This starts a chain of growth that ends when the first root appears. That's when pre-germination is complete and the seeds are ready to plant.
Pre-germination beats traditional seeding methods in several ways:
- Seeds germinate twice as fast, cutting the normal sprouting time in half. To cite an instance, Kentucky bluegrass usually takes 14 days but sprouts in about 7 days after pre-germination.
- Root development starts days earlier than regular seeds, which helps them grip the soil better.
- Seeds show better germination rates because they get just the right amount of moisture and temperature.
- Water savings are impressive - pre-germinating 4-5 pounds of seed needs just 5-10 gallons daily compared to 150-300 gallons for regular seeding on a 2,000 square foot lawn.
- On top of that, birds are less likely to eat these seeds, and rain won't wash them away easily.
This quickest way works great with cool-season grasses and slow-sprouting types like Kentucky bluegrass. Pre-germination helps you deal with tough situations, especially when you have short growing seasons or need quick grass establishment between sports events.
Step-by-Step: How to Pre-Germinate Grass Seed
Here's the practical process to pre-germinate your grass seed. You can choose between two methods based on your seed quantity.
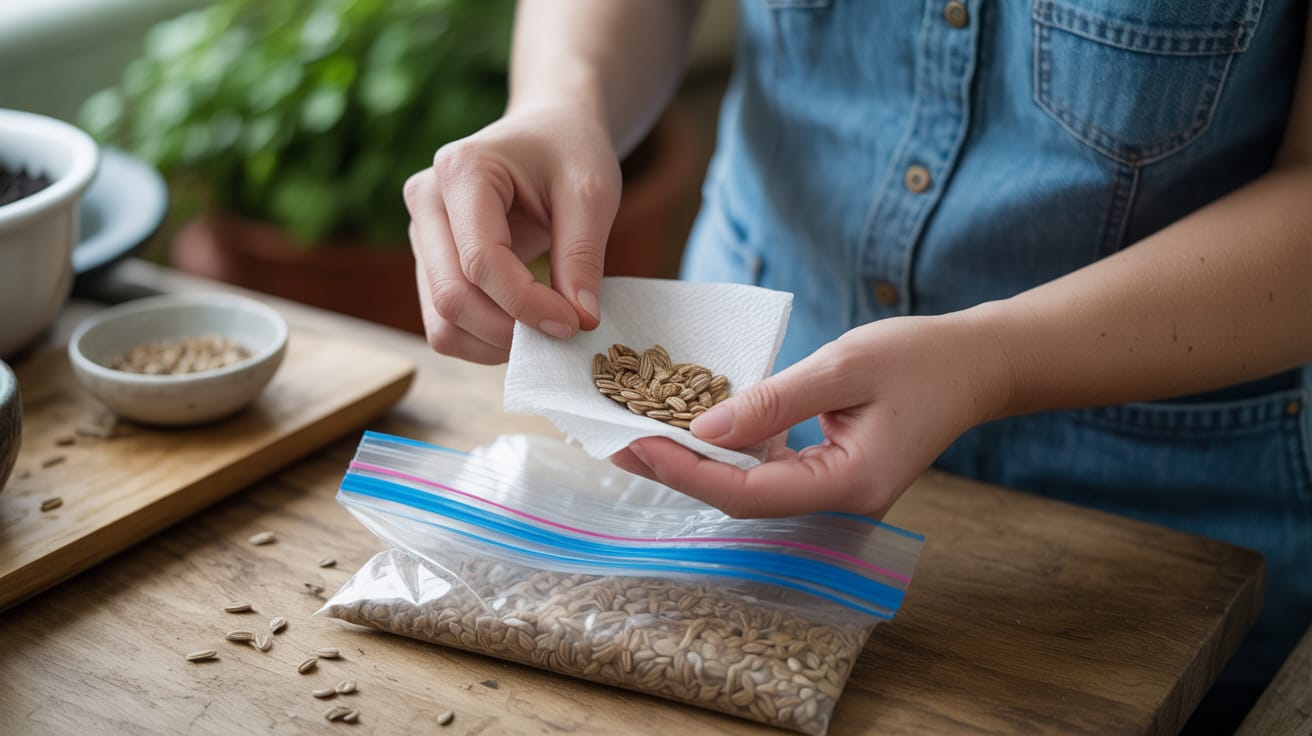
The paper towel method works best for smaller amounts:
- Wrap your seeds in a moist paper towel and place inside a zip-lock bag
- Store in a cool, dark area (or refrigerate for 30-120 days if using cool-season grass)
- Check for sprouting
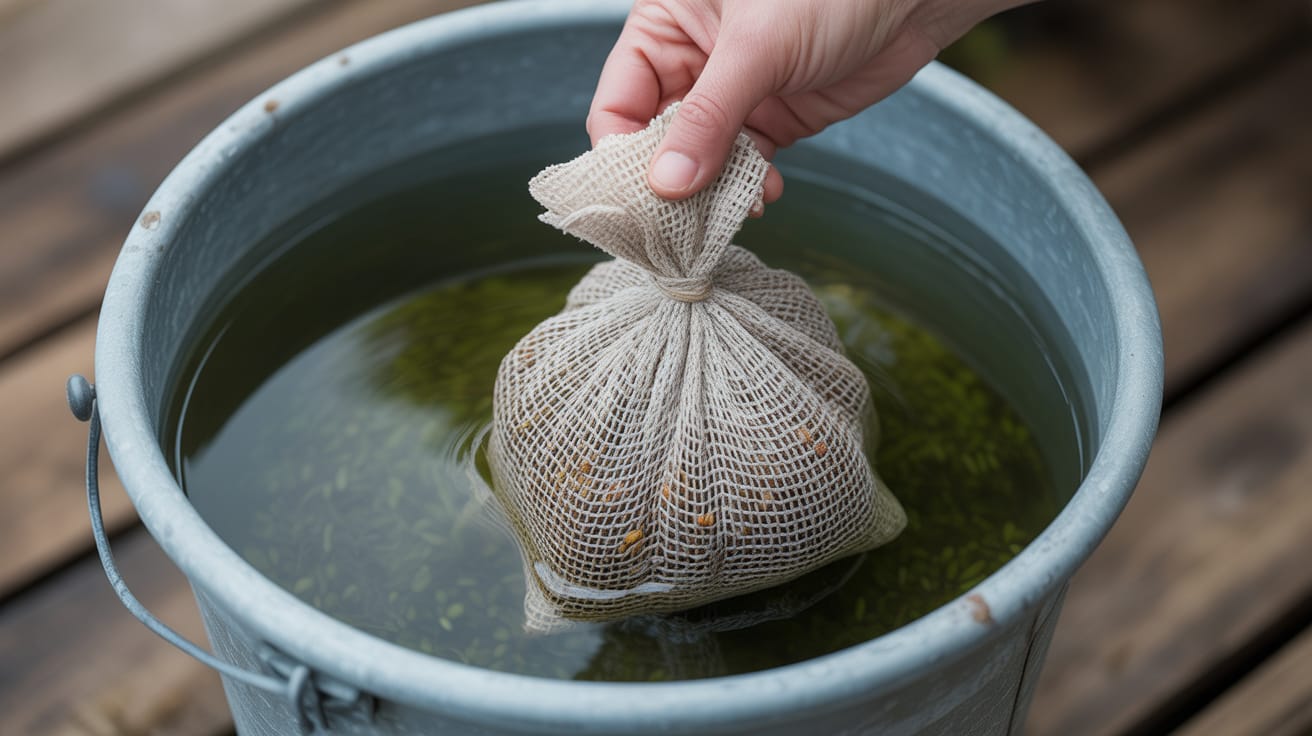
Larger quantities need the bucket method:
- Measure out your required seed amount
- Place seeds in cheesecloth, burlap sack, or cotton bag and tie securely
- Submerge completely in room-temperature water (use a weight if needed)
- Store in a dark location at 65-72°F
- Change water every 12 hours to prevent germination inhibitors from accumulating
- Continue soaking according to grass type: 2-3 days for perennial ryegrass, 3-4 days for fescues, or 5 days for Kentucky bluegrass
- Watch for tiny root tips breaking through the seed coat
- Once sprouted, remove and drain excess water (don't wring the bag)
- Spread seeds on a clean surface to prepare for immediate planting
Note that pre-germinated seeds must be planted right away since they have a drastically shorter shelf life. Weather conditions are significant—check forecasts beforehand to ensure favorable conditions for the next few days.
How to Plant and Care for Pre-Germinated Seeds
The success of your grass seed depends on proper planting and care after pre-germination. Your delicate sprouted seeds need lightly moistened soil that creates a welcoming environment.
Here's how you can plant pre-germinated seeds effectively:
- Mix with a carrier: Your drained but moist seeds need mixing with Milorganite in a 1:4 ratio by weight. This mixture helps spread the wet seeds evenly.
- Spread evenly: A broadcast spreader helps apply half the mixture first. Walk in a perpendicular direction to spread the remaining half for uniform coverage.
- Press seeds into soil: Give the area a light rake, then roll the lawn or walk over it gently. This ensures good contact between seeds and soil.
- Cover if needed: Seeds stay protected from birds under a thin layer of straw or germination blanket that retains moisture.
Proper watering becomes vital after planting. The seeds require water 2-4 times daily for 5-10 minutes each time, which provides ⅛ to ¼ inch of water daily. Seedlings need less frequent watering as they establish themselves. For those who find manual watering challenging, some homeowners experiment with innovative irrigation systems. For example, devices like the Aiper IrriSense can automate watering schedules based on weather and soil conditions. While not essential, such tools can help reduce overwatering and maintain a steady moisture level during early growth.
Your grass needs its first mowing when it reaches about 3 inches in height, usually 4-6 weeks after seeding. The soil should be dry enough to prevent wheel rutting. Sharp blades work best, and remember the one-third rule—never cut more than one-third of the blade height in one mowing.

Conclusion
Pre-germinating grass seed is a game-changing approach to establishing a lush lawn quickly. In this piece, we've seen how this simple technique cuts germination time in half and improves success rates while saving water. Without doubt, this method has clear advantages over traditional seeding.
The process stays simple, whether you pick the paper towel method for small areas or the bucket method for larger lawns. Even beginners can get professional results with basic equipment. Research shows that pre-germination works great with tough varieties like Kentucky bluegrass that usually take weeks to sprout.
Proper planting becomes vital once pre-germination is complete. Note that these seeds need immediate planting and steady moisture. Mixing with a carrier like Milorganite helps spread wet seeds evenly on your lawn. This step makes a huge difference in getting uniform coverage.
Your success with pre-germinated seed depends on watering practices. Light waterings several times a day protect delicate sprouts from drying while their root systems develop. You'll shift to deeper, less frequent watering as your new grass gets stronger.
A few weeks of patience will bring amazing results. Your lawn will grow faster, look fuller, and become stronger than traditional seeding areas. You'll also use less water and keep more seeds safe from birds or runoff.
This piece gives you the tools to try pre-germination for your next lawn project. This technique is the quickest way to get that perfect, envy-inducing lawn you've always wanted.