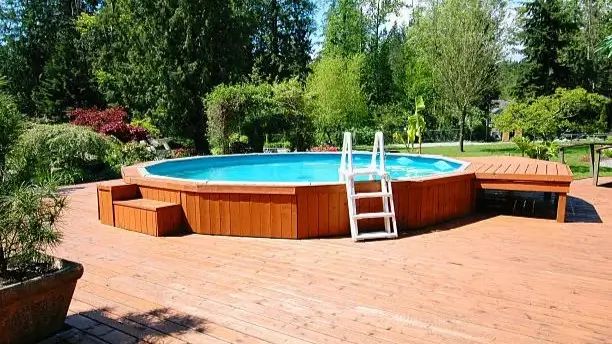
How to Level Ground for an Above Ground Pool
Proper above ground pool leveling requires digging high spots down to the lowest natural soil point, avoiding filled dirt and thick sand builds; compacted native ground prevents uneven settling, wall damage, liner tearing and long‑term pool maintenance issues.

Leveling a yard is not the fun part of owning a pool. It is heavy work, it is slow, and it is tempting to look for shortcuts. But if you are searching for how to level ground for above ground pool installation, here is the truth most experienced installers and long time owners agree on: the base is everything.
Water is heavy. And it pushes outward and downward with relentless pressure. When your pool is even slightly out of level, that pressure stops being evenly shared by the walls, uprights, and liner. That is when you start seeing leaning walls, stretched liners, and legs sinking.
The good news is you can do this yourself without spending contractor money. You just need a clear method, the right tools, and the discipline to dig down to the lowest point, not build up the low side.
If you are budgeting the full project, this above ground pool installation cost breakdown can help you plan realistically: how much does it cost to install an above ground pool.
Location & Clearance: Where to Build
Before you grab a shovel, verify your site is safe and compliant.
- Approved Surfaces: Firm, native soil or a dedicated concrete slab.
- Unsafe Surfaces: Never install an above-ground pool on a wooden deck, balcony, or elevated platform. They are not engineered to hold tens of thousands of pounds of water.
- Clearance Mandates: Maintain a strict minimum distance of 10 feet from buildings, overhead power lines, and large trees.
Why "Close Enough" Isn’t Good Enough for Pool Leveling
For an above-ground pool, "close enough" can become expensive enough. A 5,000-gallon pool weighs over 41,000 pounds. When the base is out of level, a larger share of that weight shifts to the low side.
There is a direct causal chain here: Soil Compaction → Leg Support → Liner Lifespan. If the soil is loose, the legs sink. When the legs sink, the frame shifts out of level. When the frame shifts, the liner stretches unevenly and eventually tears. Water does not negotiate. It will always find level, and it will keep pushing until something else gives.
The Two Golden Rules of Pool Leveling
If you follow only two rules, make them these. They prevent the most common base failures homeowners run into.
Rule 1: Always Dig Down, Never Build Up
Digging feels backwards at first. You see the low spot, and the instinct is to fill it.
The problem is that filled soil settles. Even when you tamp it, loose dirt is not the same as undisturbed ground. Once you add thousands of pounds of water, the “built up” areas can compress unevenly. That is when legs sink, the track under the pool shifts, and the pool drifts out of level over time.
The safest base is firm, native soil that has not been piled up. That is why the correct method is to find the lowest point in your circle and dig the high side down to match it.
Rule 2: Sand is for Padding, Not Leveling
Sand is useful, just not for fixing a slope.
If you use sand to level the yard, it can migrate under load and after heavy rain. It can also wash out at the edges. Both issues create voids that the liner can stretch into, which increases the chance of wrinkles, thin spots, and premature liner wear.
Use sand only as a thin cushioning layer on top of properly leveled soil, if your pool manufacturer allows it. Think of it as padding, not structure.
Tools Required for Pool Leveling
Having the right tools saves hours and prevents the kind of “good enough” decisions you regret later. Before you start, call 811 in the United States to locate underground utilities, and check local rules for setbacks and easements.
Here is a practical checklist:
- Shovel and spade shovel for digging and edging
- Rake for smoothing soil and pulling small stones
- Wheelbarrow or yard cart for moving soil
- A long straight 2x4, 8 feet to 10 feet is ideal, plus a carpenter’s level
- Tape measure, string, and a center stake to mark the circle
- Marking spray paint or flour to outline the footprint
- Hand tamper, or a plate compactor if you can rent one
- Optional but very helpful: a sod cutter rental to remove grass faster and with less strain
- Work gloves, eye protection, and sturdy shoes
How to Make Ground Level for Your Pool (Step by Step)
This is the DIY method that consistently works when you want a stable, long term base. The key is to move slowly and measure often.
Step 1: Mark the Pool’s Footprint (Plus Extra Clearance)
Find the center of your planned pool location. Drive a stake into the ground, then attach a string that matches the pool’s radius.
Walk the string in a circle and mark the ground as you go. Add about 12 inches of extra clearance outside the pool wall. That gives you room to dig, check level, and assemble the frame without fighting the edge of the hole.

Step 2: Clear the Sod and Vegetation
Remove all grass, roots, and organic material within the circle.
Grass left under a pool does not stay “alive and fine.” It dies, rots, and can create odors and soft spots. It also attracts insects and can stain the liner over time. Getting down to bare soil is worth the effort.
A rented sod cutter can turn this step from a full day into a couple of hours, especially on larger diameters.
Step 3: Identify the Lowest Point in the Circle
Your lowest point becomes your target height for the entire base.
Use your 2x4 and level to take quick readings across different directions, like north to south, east to west, and several diagonals. If one edge is consistently lower, that is usually the area you do not touch much. You will remove soil from the high side until the whole circle matches that low point.
If you have access to a laser level, this step gets faster, but it is not required.
Step 4: Use the 2x4 and Level Method to Dig
Set the 2x4 on the soil and place the level on top. Check across the circle, then rotate and repeat.
When the bubble shows high on one side, dig that high side down. Do not add material to the low side. Rake smooth, then check again. Expect this to be repetitive. That repetition is what gets you flat.
As you get close, take thinner scrapes instead of deep shovelfuls. You are finishing a surface, not excavating a trench. Also check for dips, not just slope. A base can be level side to side but still have a bowl in the middle if you are not careful.
Step 5: Tamp the Soil Until Solid
Once you are level, compact the soil.
Freshly exposed dirt can be fluffy, especially if it was under sod. Tamping reduces later settling, which is one of the most common reasons a pool goes out of level after it looked perfect on day one.
Tamp evenly across the entire circle. If you rent a plate compactor, follow the rental guidance and keep the passes consistent. If you use a hand tamper, take your time and focus on edges where legs and rails will sit.
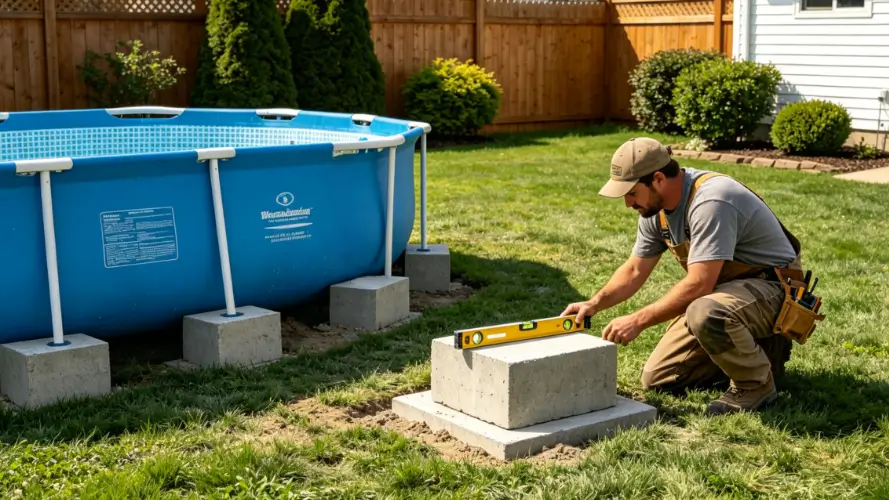
Step 6: Sink Pavers for the Pool Legs
If your above ground pool has upright legs, pavers can help spread the load and prevent sinking.
The important detail is placement. Set pavers on firm, level soil, not on loose fill and not on top of a thick sand layer. The top of each paver should be level with the finished base and level with the other pavers. If one block sits high, it can create a pressure point. If one sits low, that leg can sink first.
Use the quantity and placement pattern recommended by your pool manufacturer, since leg design varies.
Finalize Your Base for a Smooth Above Ground Pool Setup
When the hard digging is done, you are close. This is the phase where careful finishing pays off in comfort and fewer problems later.
Adding Your Sand or Foam Base
If your pool instructions recommend a cushioning layer, add it after the soil is level and compacted.
For sand, keep it thin and consistent. Many installs use a shallow layer for padding, not inches and inches of leveling material. Screed it by pulling a straight board across the surface so it stays even, then lightly tamp to lock it in place. Avoid mixing debris into the sand. Small stones are a common cause of liner punctures.
Foam cove or foam panels can also be used in some builds. Follow the pool manufacturer’s guidance so you do not trap moisture or create uneven seams.
Why a Flat Bottom Matters for Maintenance
A flat, level base is not only about structural safety. It affects how your pool looks and how easy it is to keep clean.
When the bottom is uneven, the liner is more likely to form wrinkles. Wrinkles trap dirt and algae, and they can feel unpleasant underfoot. They also create little ridges where debris settles, which means more brushing and more manual vacuuming.
If your goal is to spend less time cleaning, a smooth, wrinkle free floor supports that. You get better circulation, fewer dirt traps, and a more predictable surface for automated cleaning.
That is where cordless robotic cleaners can make ownership feel lighter. If you want a robot that can move consistently across a smooth floor without fighting wrinkles and soft spots, the Aiper Scuba V3 is one option to consider. A cordless robot is designed to take routine floor cleaning off your list. Without it, debris sits longer, stains are more likely, and you end up doing more weekend maintenance.
If you are comparing types and features across Aiper’s lineup, you can browse the full collection of robotic pool cleaners here.
Frequently Asked Questions on Above Ground Pool Leveling
What is the easiest way to level ground for a pool?
The easiest reliable method is to mark the circle, find the lowest point, and dig the high side down while checking the level with a long straight 2x4 and a carpenter’s level. Renting a sod cutter and a plate compactor can reduce effort significantly. Shortcuts like adding soil or sand to the low side usually create settling problems later.
What is the cheapest way to level ground?
The cheapest approach is manual digging with a shovel, a rake, a hand tamper, and the 2x4 and level method. It costs more time and sweat, but it avoids rental fees. Cutting corners by filling low spots is often “cheap now, expensive later” if the pool shifts.
How many bags of sand do I need to level an 18 foot pool?
Sand should not be used to level a slope, but for a thin padding layer you can estimate volume by area times depth. An 18 foot round base is about 254 square feet, so a 2 inch layer is roughly 42 cubic feet of sand. Bag sizes vary, but that often lands around 80 to 100 bags of 50 pound sand, so check the bag’s listed coverage to refine the number.
Conclusion
If you take one thing from this project, make it this: leveling is not about making the pool look nice on day one, it is about keeping the structure safe for the seasons ahead. Dig down to the lowest point. Measure constantly. Compact the soil. And treat sand as comfort padding, not a structural fix.
It is hard work, but it is also the part you only want to do once. When your base is truly level, the pool builds cleaner, the liner lays smoother, and routine maintenance gets easier to automate over time.