How to Level a Bumpy Yard: A Complete Step-by-Step Guide
Level a bumpy yard by diagnosing dip depth: use light topdressing for shallow spots (<1 inch) and the peel-back method for 1–2 inch divots. Use a 50/50 sand-topsoil mix, avoid lawn rollers, and water gently for best, grass-friendly results.

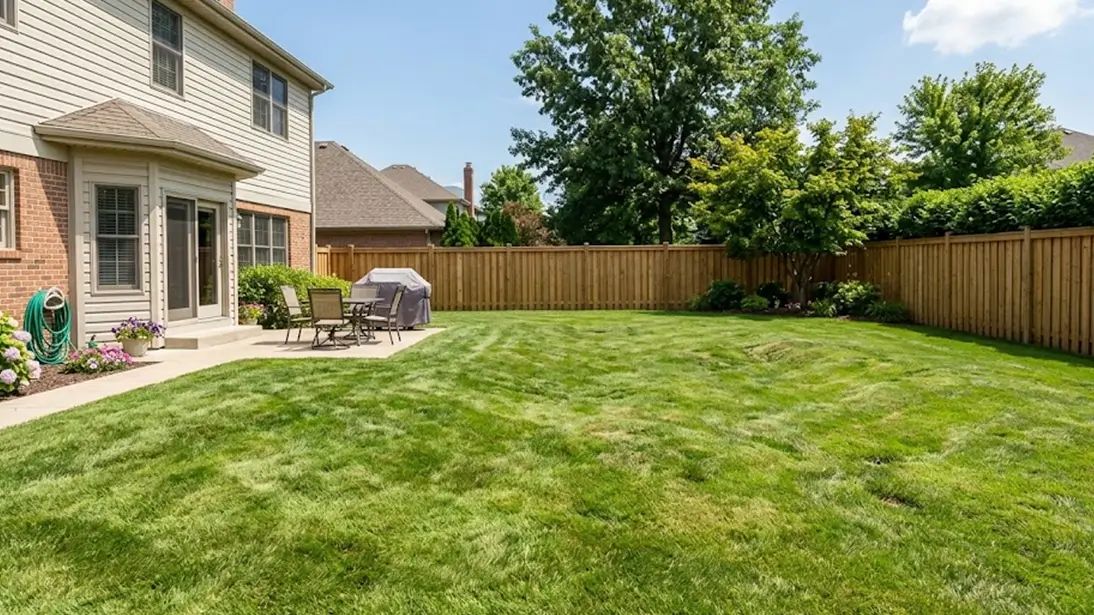
A bumpy lawn is not just about how it looks. You feel it every time you mow or walk across the yard and your foot dips unexpectedly. It makes mowing uneven and can easily lead to a twisted ankle if you are not careful. If you have been trying to figure out how to level a bumpy yard without tearing everything up or using heavy equipment, you are definitely not alone. Lawns become uneven for all kinds of reasons.
Soil settles, pets dig, water shifts things around, and over time, the surface just gets rough. The good news is that you can usually fix it without damaging the grass you already have.
Quick answer: If the bumps are small, under about an inch, a light topdressing layer usually works well. For deeper areas around 1 to 2 inches, it is better to lift the grass slightly and add soil underneath instead of piling it on top. It is best to avoid heavy lawn rollers because they press the soil down rather than fix the uneven spots. The most important thing is to work in thin layers and give the grass time to grow through and recover naturally.
Quick Answer: How to Level a Bumpy Yard
- Diagnose: Measure the depth of the dips. Ensure you maintain a slight slope away from your house for drainage.
- Shallow bumps (< 1 inch): Use a light topdressing layer over the existing grass.
- Deep divots (1–2 inches): Use the peel-back method to lift the turf and add soil underneath.
- Material: Apply a 50/50 mix of washed river sand and screened topsoil.
- Settling: Always use short, gentle watering cycles to settle the soil and avoid runoff. Avoid heavy lawn rollers.
How Bad Is Your Lawn? (Quick Self-Check)
Before you start bringing in soil or picking up tools, it is worth taking a closer look at how uneven your yard really is. Not every bump needs the same fix, and going in with the wrong approach can end up wasting time or even making things worse.
A quick way to size things up:
- Shallow dips, less than an inch deep, are the easiest to deal with. In most cases, a light topdressing layer is enough to even things out.
- Medium spots, around 1 to 2 inches, take a bit more effort. This is where a soil mix or the peel-back method comes in, so you do not end up covering and killing the grass.
- Deeper ruts, anything over 2 inches or spread across large areas, usually point to a bigger issue. At that stage, you might need to look into proper regrading rather than a simple fix.
Crucial Warning: Leveling Does Not Mean "Flat"
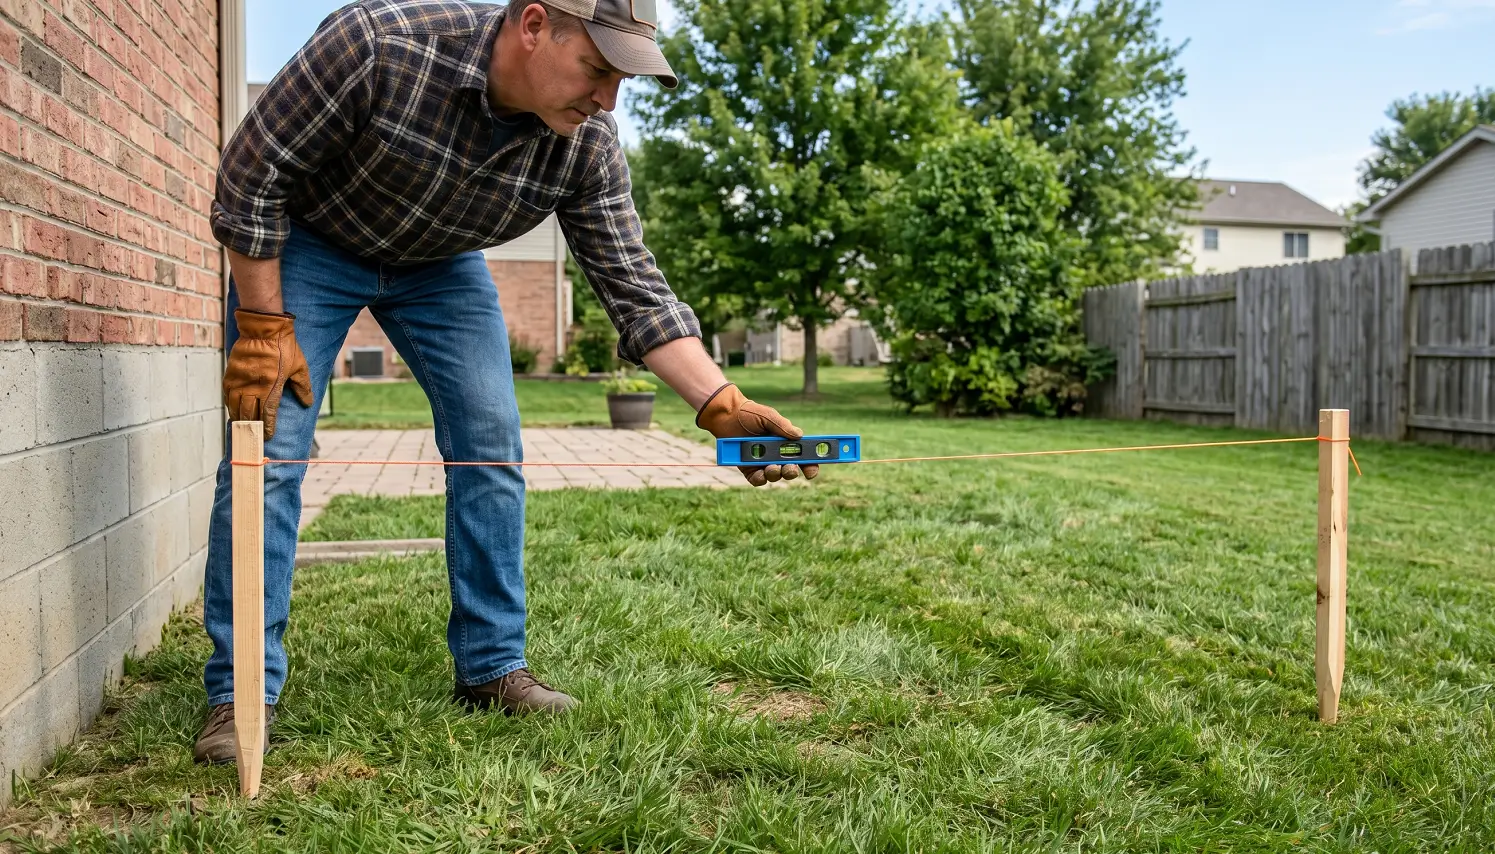
When figuring out how to fix lumpy grass, remember the golden rule of landscaping: your yard should never be perfectly horizontal. You must maintain a minimum 2% drainage slope (about a 1/4-inch drop per foot) away from your home's foundation.
DIY Tip: Drive two stakes into the ground—one near the house, one further out. Tie a string between them and use a string level to ensure the ground drops safely away before you start filling in low spots.
Choosing the Right Leveling Mix: Sand vs. Topsoil
A lot of people get stuck at this step because they assume any dirt will do. It sounds simple enough, just spread something over the lawn and call it a day, but the material you choose actually makes a big difference in how well the results hold up.
- Topsoil on its own can work, but it tends to compact over time. In some yards, especially ones that already struggle with drainage, it can make things worse instead of better.
- Sand is often used for leveling because it spreads easily and helps with drainage. The problem is, if your lawn has clay-heavy soil, adding straight sand can turn the surface into something hard and dense that roots struggle to grow through.
- Compost is great for improving soil quality, but it does not stay put for long. Since it breaks down fairly quickly, the areas you level out can sink again after a season.
The Best Solution: A 50/50 Mix
For most residential lawns, a mix of half washed river sand and half topsoil gives the most consistent results.
Pro Tip: Store-bought topsoil often contains small rocks or weed seeds. Build a simple sieve using 1/4-inch hardware cloth stapled to a wooden frame. Sifting your mix before applying it will save you from a massive weed headache later.
How to Level a Bumpy Yard Without Heavy Equipment
If you’re thinking this will require expensive tools or big equipment, it usually doesn’t. Most uneven lawns can be fixed with simple tools you may already have and a bit of patience. The goal here is not to redo the whole yard, but to fix the problem areas one step at a time.
Step 1: Mow Short & Dethatch
Start by cutting your grass a little shorter than you normally would. You do not want to scalp it completely, just enough so the surface becomes easier to read. Once the grass is shorter, the dips and bumps stand out much more clearly.
After that, check if there is a layer of thatch built up. If there is, it is worth clearing it out first. That dead grass layer can stop your soil mix from reaching the actual ground. When that happens, the material just sits on top instead of settling in, and the lawn ends up looking uneven again pretty quickly.
Step 2: Core Aeration
Many bumpy lawns are also compacted. That means the soil underneath is dense, restricting airflow, water movement, and root growth.
Core aeration removes small plugs of soil, loosening things up before you add your leveling mix. It helps the new material integrate better and gives the roots space to grow.
If you’re new to this, check out the basics of core lawn aeration to understand how and when to do it effectively.
Step 3: The "Peel-Back" Method for Deep Divots
For dips that are 1–2 inches deep, simply dumping soil on top is a bad idea. It can smother the grass and kill it completely.
Instead, use the peel-back method:
- Take a flat shovel and cut a clean slit around the affected area.
- Gently lift the turf like you’re peeling back a piece of carpet.
- Add your soil mix underneath until the area is level.
- Fold the grass back into place and press it down lightly.
This method keeps the grass alive while correcting the underlying problem. It takes a bit more effort, but the results are far better than trying to bury the issue.
Step 4: Topdressing for Shallow Bumps
For smaller dips, spread your 50/50 mix evenly across the surface using a leveling rake. Focus on low spots rather than covering the entire lawn.
A good rule of thumb: if you can’t see the grass blades anymore, you’ve added too much.
According to the basics of core lawn aeration, apply no more than ½-inch of material at a time to avoid smothering the existing grass.
If you want a deeper walkthrough, this guide on applying a thin top dressing layer explains the process step by step.
Step 5: Sweep and Water
Once you have spread the mix, grab a push broom and lightly work it off the grass blades and down into the soil. You do not need to press hard, just enough to help it settle in. This step makes a difference because it keeps the grass from getting buried and helps it grow back through the layer.
This is also the point where things can go wrong if you are not careful.
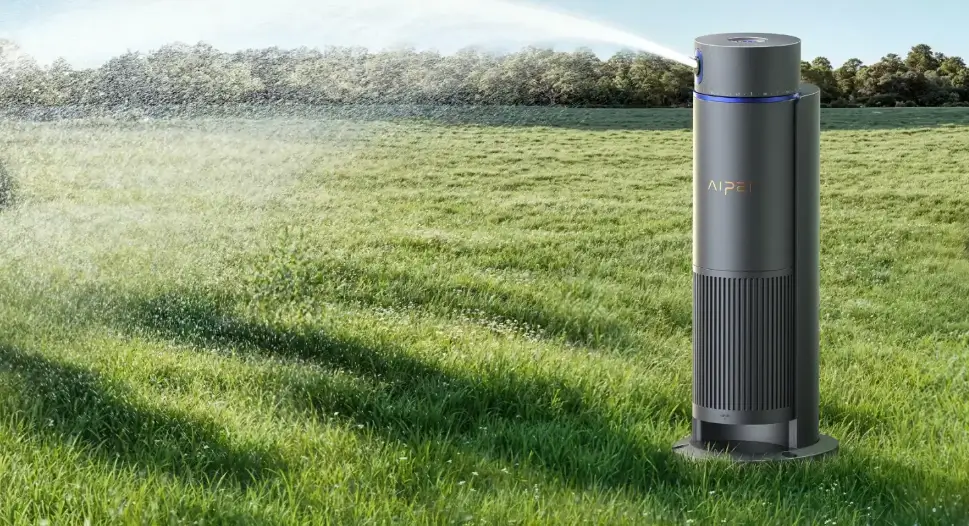
A lot of people water too aggressively right after leveling. It seems like the right thing to do, but heavy watering can actually move the soil around and push it right back into the low spots you just fixed.
It is better to water lightly and in short intervals so the mix settles slowly. Something like the Aiper IrriSense 2 can help with that since it lets you control watering in smaller cycles instead of soaking everything at once. That way, the soil stays in place and spreads more evenly instead of washing away.
When to Stop DIYing: Large Fields & Severe Slopes
While this guide focuses on DIY methods, it's important to know your limits. If you are trying to figure out how to level a large bumpy field (over 2,000 sq. ft.) or a yard with severe structural erosion, manual raking will exhaust you and likely fail.
In these extreme scenarios, you are better off renting semi-mechanized equipment like a power rake or hiring professionals with a skid steer to regrade the property properly.
Should You Use a Lawn Roller?
It’s a common assumption: if your lawn is bumpy, just roll it flat. Unfortunately, it doesn’t work that way.
Lawn rollers don’t fix uneven ground; they compress it. That means they push air out of the soil, compacting it and making it harder for roots to grow.
For deep dips, rollers do almost nothing. For the rest of your lawn, they can actually make the problem worse over time.
The only time a roller makes sense is after seeding, and even then, it should be used lightly. For leveling, targeted fixes are always more effective.
Common Lawn Leveling Mistakes to Avoid
When figuring out how to flatten your lawn, it’s easy to go too far or rush the process. Here are a few mistakes to watch out for:
- Tilling the entire yard: This might seem like a quick reset, but it’s a massive project that can destroy healthy grass and create new problems. Spot-fixing is almost always the better option.
- Adding thick layers of soil: It’s tempting to fix everything in one go, but heavy layers can suffocate your grass. Thin, gradual applications work much better.
- Ignoring soil type: Using the wrong mix can lead to drainage issues or compaction.
- Overwatering right after leveling: This can wash away your work and create new uneven spots.
Patience really is key here. Lawn leveling is more about consistency than speed.
Tools You Need
You don’t need a huge setup to get started. Most homeowners can handle this project with a few basic tools:
- Wheelbarrow
- Flat shovel
- Leveling rake (much better than a leaf rake for this job)
- Push broom
- 50/50 sand and topsoil mix
Having the right rake alone can make a noticeable difference in how smooth your final result looks.
Conclusion
Learning how to level a bumpy yard isn’t about perfection; it’s about making your lawn safer, easier to maintain, and more enjoyable to use. By focusing on small, targeted fixes and using the right materials, you can smooth out uneven areas without damaging your existing grass.
A level lawn also improves mowing results. It prevents scalping, reduces wear on your equipment, and helps robotic mowers move more efficiently without getting stuck or missing patches.
Take it step by step, and you’ll start to see real improvements within a couple of weeks.
FAQs About Leveling a Lawn
How much does it cost to level a yard DIY?
For most small to medium lawns, expect to spend around $50 to $150. This typically covers a few cubic yards of soil mix and basic tools like a leveling rake.
Can I level a lawn without killing the grass?
Yes. Use the peel-back method for deeper holes and keep topdressing layers thin; no more than ½ inch at a time, to allow grass to grow through.
How long does it take to see results?
If you level your lawn during the growing season (spring or early fall), grass usually pushes through the new soil within 1 to 2 weeks. After that, the lawn begins to look more even and healthy.